How To Quickly Clean Everything In Your Kitchen
1 Countertops
Materials Needed
- An all-purpose cleaning spray
- A microfiber cloth or dish towel
- Disinfectant wipes
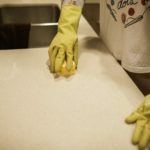
The first step to cleaning your countertops is to clear off any clutter as well as those items that stay there all the time, including cooking oils, utensils, and the like. Now that the countertops have been cleared, you can employ one of two methods to clean them.
The first is to grab your all-purpose cleaning spray and your microfiber cloth or dish towel and wipe down the countertops. The second method is to use a disinfectant wipe like the ones made by Lysol or Clorox. They kill 99.9% of germs and make cleanup a cinch!
2 Floor

Materials Needed
- Broom
- Dustpan
- Trash can
- Vacuum
- Robot mop
The first materials you need to grab when cleaning the kitchen floor are the broom and dustpan. Sweeping will help get rid of crumbs, dust, and debris. Once you’ve swept the entire floor, scoop the dirt into the dustpan and toss it into the trash can. Next, turn on the vacuum to get all of the crumbs, dust, and debris your broom missed. Lastly, grab your robot mop (if you have one) and sit back while it does the cleaning for you.
Robot mops are similar to robot vacuums in that they don’t provide a deep clean, but they do provide an extra level of clean to reduce the number of times you have to deep-clean your kitchen floor.
3 Fridge

Materials Needed
- Warm, soapy water
- A rag
- A dusting tool
The first step to quickly cleaning your refrigerator is to go through each shelf and remove everything that has expired. Next, take your rag and warm, soapy water, and wipe down any spills you see. Then, put everything in its rightful place.
Now that the inside is clean, you’ll want to focus your attention on the outside. Wipe down the entire outside of the fridge and polish it with a stainless steel cleaner if necessary. Lastly, use a long-handled dusting tool to dust the top of the refrigerator.
4 Sink And Garbage Disposal
Materials Needed
- An all-purpose cleaning spray
- A microfiber cloth, dish towel, or sponge
- A lemon
Wipe out the bowl or bowls, if you have a double sink, using the all-purpose cleaning spray and the microfiber cloth, dish towel, or sponge. If necessary, put the cloth or towel in with the dirty laundry so it can be washed later.
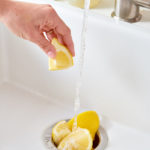
As for your garbage disposal, there is a quick and easy solution to help freshen it up a bit. Simply cut up a lemon and run a couple of slices through the garbage disposal. This will freshen up the garbage disposal AND your entire kitchen at the same time.
5 Dishes
Materials Needed
- Hot water
- Dish soap
This tip is not for a sink full of dirty dishes. Rather, it’s for when your sink is empty and you are about to start cooking.
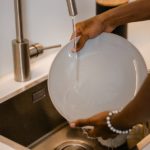
Prior to beginning food preparation, fill your sink with hot water and a few drops of dish soap. As you go through your dishes (e.g. knives, mixing bowls, pots, pans, cutting boards, etc.), quickly wash them out to prevent food from drying and sticking to them. If necessary, let heavily soiled items soak in the sink a few minutes before washing them.
These steps not only cut down on the amount of time spent trying to get junk and gook off your dishes, it also cuts down on the amount of time spent washing dishes after a meal.
6 Dishwasher
Materials Needed
- Warm water
- Distilled white vinegar
- Baking soda
- Toothpick
- Toothbrush
- Microfiber cloth
- Rubber gloves
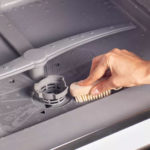
After you’ve gathered your materials, the next step is to remove the filter, utensil holders and dishwasher racks, and soak them in a mixture of warm water and a cup of white distilled vinegar. While these items are soaking, take the time to clear out all the debris that was hiding behind them, and be sure to use a toothbrush and/or toothpick to clear out any food particles lodged in tiny crevices.
The next step is to run the dishwasher on a hot water cycle with vinegar. Do this by filling a dishwasher-safe bowl with one cup of white vinegar and placing the bowl on the bottom of the empty dishwasher. Lastly, run another short wash cycle, but this time with baking soda.
Now that you’ve cleaned the inside, grab a cleaner that’s specially formulated for dishwasher surfaces, and wipe down the door.
7 Microwave

Materials Needed
- Water
- A sponge
- A microfiber cloth
- White vinegar or an all-purpose cleaner
To quickly clean the inside of your microwave, toss a wet sponge into the microwave and heat it on high for one minute. The steam from the sponge will loosen any gunk. Next, wipe down the inside with the sponge. NOTE: You can also steam the inside of the microwave with vinegar.
Lastly, depending on your microwave’s exterior finish, use either a microfiber cloth dampened with a white vinegar solution or an all-purpose cleaner to wipe down the outside. Avoid using vinegar on stainless steel as it could strip the shine.
8 Kitchen Table
Materials Needed
- An empty box/basket/bin
- Two buckets
- A spray bottle
- Warm water
- Dishwashing liquid
- White vinegar
- A lemon
- Microfiber cloths
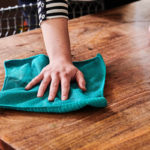
For most of us, the kitchen table is the place where we unload everything—the mail, the car keys, the grocery list, and so on. So, it makes sense that the first step to cleaning it is to get rid of the clutter. That being said, gather up any items that don’t belong on your kitchen table and toss them into an empty container.
The next step is to clean the table. This will vary depending on the tabletop. For example, if you have a wooden table, you will need to fill both buckets with water, but add a cup of vinegar (this has antimicrobial properties) and a few drops of the dish soap to only ONE of the buckets. Mix the solution, dip your cloth into the mixture, and wipe down your table. Then, take a clean, dry cloth, dip it in the bucket of plain water, and rinse the mixture from the table. Lastly, take another clean, dry cloth and use it to dry your table.
If, on the other hand, your tabletop is glass, fill a spray bottle with a 50/50 solution of warm water and white vinegar, and spray the solution over the table. Wipe it around using the microfiber cloth. Lastly, buff the glass with a dry microfiber cloth.
9 Toaster
Materials Needed
- A dry toothbrush
- Baking soda
- Dish soap
- White vinegar
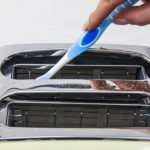
Before you begin cleaning your toaster, please make sure you unplug it first. Next, locate the crumb tray, remove it, and empty its content into the trash. Then rinse it and dry it thoroughly before putting it back in place.
Now that you’ve cleaned the crumb tray, the next thing to tackle is the inside—i.e. the heating coils. Cleaning them is a lot easier than you might think. Simply grab the dry toothbrush and swipe it around the coils to loosen up any debris that may be covering them. Then, head over to the trash can, turn the toaster upside down, and gently shake out the crumbs.
Lastly, wipe down the outside of the toaster with a mixture of baking soda and dish soap. Just make sure you don’t use this mixture to clean the top of the toaster. After all, you don’t want this stuff dripping down onto the heating elements. To clean the top, simply use a small amount of white vinegar on a clean, dry cloth.
10 Coffee Maker
Materials Needed
- White distilled vinegar
- Water
- Coffee filters
- A cleaning cloth
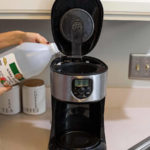
Cleaning your coffee maker is as simple as running a vinegar cycle through it. I’ll explain how:
Step 1: Fill the coffee maker with a 50/50 solution of white distilled vinegar and water.
Step 2: Position a filter in the basket and turn on the brewer. Turn it off about halfway through brewing and let the remaining solution soak in the carafe and the reservoir.
Step 3: Turn the coffee maker back on and finish the brewing cycle.
Step 4: Remove the filter, pour out the solution, and flush the vinegar smell from the coffee maker. You can do this by filling the reservoir with fresh water, putting a filter in the basket, turning the coffee maker back on, and completing the brewing cycle.
Step 5: Remove the filter and pour out the water.
Step 6: Wipe down the coffee maker and coffee pot with a clean cloth.
11 Oven
Materials Needed
- An all-purpose cleaner
- Diluted dish soap
- White vinegar (optional)
- Warm, soapy water
- A rag
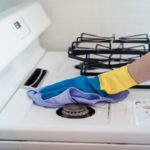
Now that you’ve gathered your materials, the next thing you need to do depends on the type of stove you have. If you have a gas stove top, remove the grills and wipe the surface underneath with an all-purpose cleaner. If you have electric burners, clean them with a diluted dish soap and wipe the surface underneath them with an all-purpose cleaner. If you have an electric glass stove top, you can wipe the entire thing down with warm, soapy water.
Once the top of the stove is clean, it’s time to clean the front. Using an all-purpose cleaner, white vinegar or diluted dish soap, wipe down the entire front of your oven, being sure to include the handles, knobs, and display.
12 Blender
Materials Needed
- Warm water
- Baking soda
- Dish soap
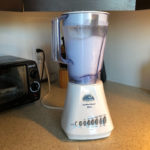
Believe it or not, cleaning a blender is not as hard as it seems if you know the right technique, and that technique involves letting the blender clean itself. Here’s how:
Pour some warm water, a bit of baking soda, and a little dish soap in your blender. Next, plug it in and press the “pulse” button. Let the blender stay on for a few seconds, then turn it off. Lastly, give it a good rinse and your blender will be looking like new in no time.
13 Cutting Boards
Materials Needed
- A lemon
- Kosher salt
- Water
- A dishwasher
The exact method for quickly cleaning a cutting board will depend on its type. Plastic cutting boards can be put into the dishwasher. Simple enough, right?
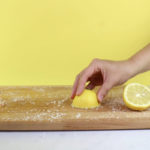
Wooden cutting boards, however, require a bit more care, but they can still be cleaned quickly. All you need to do is sprinkle some kosher salt on the cutting board, use half a lemon to rub it in, and let the mixture sit for a few minutes. Then, rinse the board with clean water, and voilà, a spotless cutting board!
14 Dish Towels And Dish Cloths

Materials Needed
- A bucket
- Warm/hot water
- Vinegar
- Bleach
Keeping your dish towels and dish cloths fresh and clean is an important part of keeping your whole kitchen fresh and clean. Just follow these simple steps to keep your dish towels and cloths odor free:
- Wash them regularly.
- Add bleach to the laundry load when washing white dish towels and cloths.
- Soak them in a bucket of warm water and vinegar for about 15 minutes.
- Place your towels in a pot of boiling water for about 5-7 minutes to kill bacteria and remove odors. Do this once a month.
- Wash your dish towels and cloths with hot water.
- Don’t leave wet dish towels and cloths in the washing machine for an extended period of time.
- Always hang up your dish towels and cloths between uses so they can dry out, and don’t hang them on top of each other.
- Keep your kitchen dry and clean because your towels can pick up moisture and smells in the air.
15 Sponges
Materials Needed
- Water
- Microwave
Yes, sponges are generally used to clean up things, but keep in mind that they must be cleaned regularly as well. Not doing so can lead to you spreading millions of bacteria throughout your home.
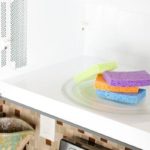
So, what’s the quickest way to clean your sponges? Believe it or not, all it requires is wetting them just enough so that they’re damp and putting them in the microwave on high for 90 seconds. According to the Journal of Environmental Health, this technique reduces the amount of bacterial contamination by up to 99%.
WARNING
Please do not put sponges with metal scrubbers in the microwave. As most of us know, metal and microwaves don’t mix.
16 Cabinets
Materials Needed
- A damp cloth
- A glass cleaner
- An old toothbrush
- Water
- Soap
- An all-purpose cleaner
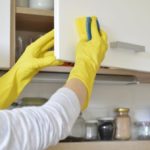
How to Clean Painted Cabinets – Use a damp cloth to wipe off dust on the surface. For hard-to-reach places (e.g. hinges, inside grooves, etc.), clean with an old toothbrush and some soap and water.
How to Clean Laminate Cabinets – Use an all-purpose cleaner to remove simple stains and grease. Use an old toothbrush and some soap and water on hard-to-reach areas.
How to Clean Glass Cabinets – Use a glass cleaner (e.g. Windex) to clean both sides of the cabinet door. Use a damp cloth to wipe off dust on the wooden frame. Use an old toothbrush and some soap and water on hard-to-reach areas.
17 Windows

Materials Needed
- White distilled vinegar
- Hot water
- A bowl
- A spray bottle
- A microfiber cloth
Yes, you could just clean your windows with Windex and a paper towel, but that’ll likely leave streaks. That’s why so many people recommend cleaning them with vinegar. Here’s how to do it:
First, make a mixture of one part vinegar and one part hot water in a bowl. Pour the mixture into the spray bottle. Then, spray the mixture over a small area (about one square foot) at the top of your window pane. Let it sit for a few minutes, then wipe it up using the microfiber cloth. Continue working in small areas until the entire window is clean.
18 Lighting

Materials Needed
- A dusting tool
- A microfiber cloth
- A spray bottle
- Warm water
- Mild dish soap
- Vinegar
The quickest and easiest way to keep the lighting in your kitchen clean is by dusting it weekly. Simply use a long-handled dusting tool to reach and dust ceiling lights, chandeliers, and inside the opening of recessed lighting. “If this is done weekly, the deep cleaning portion of cleaning light fixtures should only need to be done twice a year,” The Spruce wrote in an article published on its website.
For glass ceiling fixtures, unscrew them from the ceiling, lamp or base, and empty out any dust, bugs, and other debris inside. Next, use a microfiber cloth to dust inside and outside. Then, soak the glass fixtures in warm water and a few drops of dish soap for just a few minutes. Wipe them down and rinse before drying the inside and outside with a towel.
For chandeliers, mix 1/4 cup of vinegar and 3 to 4 cups of water in a spray bottle. After taking the chandelier down, spritz the crystals and pieces of the chandelier one section at a time. Use a microfiber cloth to dry the crystals and pieces right away. Reassemble the chandelier.
19 Misplaced Items

Material Needed
- A basket/plastic bin/empty box
The kitchen is a place reserved for food, beverages, and dishes, but if you were to take a peek into many kitchens across America, you’d find just about everything else in them, including mail, car keys, spare change, and handbags. Thankfully, it won’t take but a minute or two to remove these misplaced items from your kitchen. All you need is an empty container of some sort, be it a box, basket, or plastic bin.
Now, take a look around your kitchen at everything that doesn’t belong there and place all of those items in your empty container. Lastly, put all of the items in their proper places.
20 Trash Can
Materials Needed
- Vacuum
- Disinfectant wipes
- Trash bags
Believe it or not, making sure your trash can is clean is also an important part of making sure you get your kitchen as clean as you can. The first thing you need to do is go around the kitchen and gather up any trash that might be lying around on the floor or countertops and throw it away. Next, take the trash out to your garbage can outside.
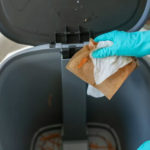
Once you come back inside, use your vacuum cleaner to suck up any crumbs in the bottom of your trash can. Then, wipe the inside and outside of the trash can with some disinfectant wipes. Lastly, wait for the trash can to dry out and reline the container with a new trash bag.
