How To Clean Your Kitchen In 15 Minutes

When it comes to house cleaning, there aren’t many things worse than a kitchen with a stack of dirty dishes, food splattered all over the stove and countertops, and crumbs everywhere. Thankfully, I have some tips to share with you that will get your kitchen clean in a heartbeat.
Because, let’s be honest, no one wants to spend hours cleaning, especially if you are expecting guests for dinner, but 15 minutes seems pretty reasonable, am I right? So here are the steps to follow to quickly have a clean kitchen.
Step 1 – Gather Your Supplies

First things first. Before you start cleaning anything, you should gather all the cleaning supplies you will have to use. Doing so will help optimize your time because you will have everything you need on hand. Now, just exactly what you need for each task will vary depending on the part of the kitchen you are cleaning.
That being said, here’s a full list of all the supplies you’ll need to clean each area of your kitchen in a heartbeat:
- All-purpose cleaner
- Microfiber cloths or dish towel
- Basket/box/plastic bin
- Disinfectant wipes
- Warm/hot water
- Dish soap
- Vacuum cleaner
- Trash bag
Now that you’ve gathered your supplies, it’s time to start cleaning!
Step 2 – Soak Your Dirty Dishes
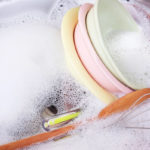
There’s nothing worse than trying to wash dishes with food stuck to them. However, even if your dishes are dishwasher safe, your dishwasher does not work miracles, so if there is too much food residue stuck to it, you have to take care of it first. That’s why it’s important to sort out right away the dirty dishes that are lying around on your counter and in the sink.
For the more problematic dishes, immediately fill your sink with hot, soapy water and let them soak while you do the next tasks. When you come back to it, the encrusted dirt will mostly have lifted off.
Step 3 – Collect Misplaced Items In A Container
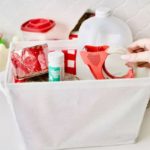
The kitchen is a place reserved for food, beverages, and dishes, but if you were to take a peek into many kitchens across America, you’d find just about everything else in them, including mail, car keys, spare change, and handbags. Thankfully, it won’t take but a minute or two to remove these misplaced items from your kitchen. All you need is an empty container of some sort, be it a box, basket, or plastic bin.
Now, look around your kitchen at everything that doesn’t belong there and place all of those items in your empty container. Lastly, take the container to another room so all the items can be put in their proper places—but only at a later time, when you have time for this. Because remember—right now, your focus is on getting your kitchen clean.
Step 4 – Put Away Kitchen Items

Now that you’ve cleared out everything that doesn’t belong in your kitchen, focus your efforts on putting away the things that do belong in there. For example, take this time to empty the dishwasher if it’s full of clean dishes and put them in the cupboards and/or drawers. Put away any dishes that may be in the drying rack as well.
TIP
Don’t get carried away and start organizing or rearranging items in the drawers and cupboards. Remember, your goal is to clean up as quickly as possible. That being said, you can always save those tasks for another day when you aren’t as pressed for time.
Step 5 – Load Your Dishwasher
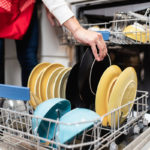
Now that you have emptied your dishwasher, you can load it again with the dishwasher-safe dishes you have, including the dirtiest dishes that have been soaking in hot water and dish soap for several minutes now.
If you ever have pieces of dishes that unfortunately can’t go in the dishwasher, take advantage of the hot water already in your sink to quickly wash them by hand, wipe them and put them back in their places. When you are finished, empty your sink.
TIP
Unfortunately, if you don’t have a dishwasher, this step may take you longer. If this is the case, try to do your dishes as you use them as much as possible. You’ll do it more often, but it will only take a few minutes each time.
Step 6 – Gather And Discard Trash
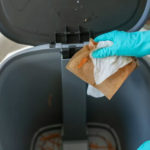
Make your way around the kitchen and gather up any trash you may see on the floor, the countertops and the kitchen table, and throw it away. Next, take the trash bag out to the garbage can outside, being sure to empty any crumbs in the bottom of the trash can into the bag before tying it up.
Once you come back inside, reline the trash can with a new trash bag. If there were any spills inside the trash can due to a ripped bag, quickly wipe the inside down with a disinfectant wipe and let it dry before relining the can.
Step 7 – Wipe Down The Counters

First, do a dry wipe to remove any crumbs from your counters, being sure to brush them into your hand and dump them into the garbage disposal. Now that the crumbs are gone, you can employ one of two methods to quickly clean your kitchen counters.
The first is to grab an all-purpose cleaning spray and a microfiber cloth or dish towel and wipe down the countertops. The second method is to use a disinfectant wipe like the ones made by Lysol or Clorox. They kill 99.9% of germs and make cleanup a cinch!
Step 8 – Wipe Down The Kitchen Table
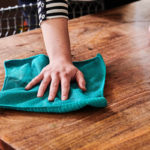
Prior to applying any cleansers, use a dry cloth to wipe away any dust, crumbs or other debris that may be on your table.
The best method for cleaning your table will vary depending on the tabletop. For example, if you have a wooden table, you will need to wipe down your table using water and a mixture of one cup of vinegar (this has antimicrobial properties) and a few drops of dish soap. After you’ve finished, take a clean, dry cloth, dip it into plain water, and rinse the mixture from the table. Lastly, take another clean, dry cloth and use it to dry your table.
If, on the other hand, your tabletop is glass, fill a spray bottle with a 50/50 solution of warm water and white vinegar, and spray the solution over the table. Wipe it around using the microfiber cloth. Lastly, buff the glass with a dry microfiber cloth.
Step 9 – Vacuum The Floor

Last, but certainly not least, is the kitchen floor. After cleaning everything else in your kitchen, including the counters and the kitchen table, there’s sure to be a ton of new crumbs on the floor. To make this step as fast as possible, bypass the broom and dustpan and head straight for the vacuum cleaner.
Simply vacuum your entire kitchen. You want a quick clean, so stick to the visible and easy-to-reach areas. This is not the time to get down on your hands and knees on the floor to vacuum under your appliances! Keep that part for another time. If you have a robot vacuum cleaner, even better! Let it do the job for you.
Step 10 – Trust Us!

We know that cleaning is not pleasant, and all these steps can seem endless. You may be thinking, “They’re crazy at BetterBe, it’s impossible to accomplish all these tasks in just 15 minutes!” But before you give up, please give it a try!
If you don’t waste a single second and just focus on the tasks at hand, it’s all very doable. You can even listen to your favorite music and sing at the top of your lungs if you want to. You’ll see, it’s very motivating, and it truly helps!
And If You Have A Bit More Time Ahead Of You…

15 minutes is really not a long period of time. That’s why a 15-minute kitchen cleaning is efficient, very suitable, but not perfect. Therefore, from time to time, it is important to take a little more time and clean the room more thoroughly.
So, if you have a little more than 15 minutes to spare in your day but still want a rather quick cleaning, or if you can put it off until tomorrow or in a few days, here are a few other quick and easy steps to follow to get your kitchen—and what’s in it—even cleaner.
For these additional steps, you’ll need:
- Stainless-steel cleaner
- Lemon
- White vinegar
- Spray bottle
- Long-handled dusting tool
- Robot mop (or traditional mop)
Step 11 – Wipe Down Small Appliances And Anything That Stays Out On The Counters
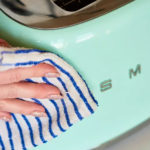
Use an all-purpose cleaning spray and a microfiber cloth to quickly wipe down the exterior of small appliances like the toaster, toaster oven, blender, and coffee maker. Next, focus your attention on cleaning the other stuff that stays on your counters. This can include an urn for holding utensils, a rack of mugs, or a tray of cooking oils. Wipe down the trays, urns, and any bottles and containers.
“While you’re at it, consider whether there’s anything you’ve been keeping on the counters that you could put in a cabinet or drawer instead,” Apartment Therapy wrote in an article published on its website.
Step 12 – Clean The Exterior Of The Stove And Oven
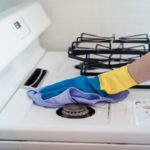
How you clean the exterior of your stove and oven depends on the type of range you have. If you have a gas stovetop, remove the grills and wipe the surface underneath with an all-purpose cleaner.
If you have electric burners, clean them with a diluted dish soap and wipe the surface underneath them with an all-purpose cleaner. If you have an electric glass stovetop, you can wipe the entire thing down with warm, soapy water.
Once the top of the stove is clean, it’s time to clean the front. Using an all-purpose cleaner, white vinegar or diluted dish soap, wipe down the entire front of your oven, being sure to get the handles, knobs, and display.
Step 13 – Wipe Out The Sink And Deodorize The Garbage Disposal
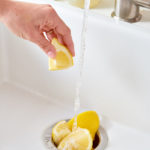
First, use a clean paper towel to wipe away any stray food that may be in your sink. Throw the paper towel in the trash. Next, wipe out the bowl or bowls, if you have a double sink, with an all-purpose cleaning spray and a microfiber cloth or dish towel. Put the cloth or towel in with the dirty laundry so it can be washed at a later time.
As for your garbage disposal, there is a quick and easy solution to help freshen it up a bit. Simply cut up a lemon and run a couple of slices through the garbage disposal. This will freshen up the garbage disposal AND your entire kitchen at the same time!
TIP
Make sure you rinse your sink with hot water after every use. This will flush away acidic liquids that could leave a porcelain or stainless-steel sink pitted.
Step 14 – Clean The Microwave
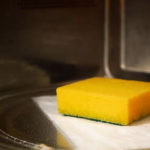
To quickly clean the inside of your microwave, toss a wet sponge into it and heat it on high for one minute. The steam from the sponge will loosen any gunk. Next, wipe down the inside with the sponge, but be careful because the sponge will likely be hot.
NOTE: You can also steam the inside of the microwave with vinegar.
Lastly, depending on your microwave’s exterior finish, use either a microfiber cloth dampened with a white vinegar solution or an all-purpose cleaner to wipe down the outside. Avoid using vinegar on stainless steel as it could strip the shine.
Step 15 – Clean The Lights
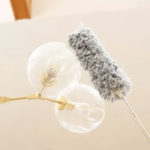
The quickest and easiest way to keep the lighting in your kitchen clean is to make sure you dust it weekly. Simply use a long-handled dusting tool to reach and dust ceiling lights, chandeliers, and inside the opening of recessed lighting. “If this is done weekly, the deep cleaning portion of cleaning light fixtures should only need to be done twice a year,” The Spruce wrote in an article published on its website.
And that’s all there is to it, folks! Simple, right? Unfortunately, there’s likely dust all over your kitchen table now since you just cleaned the chandelier hanging over it. So if you think you have time to do this task along with everything else, we suggest you actually do it BEFORE you clean your table!
Step 16 – Clean The Windows
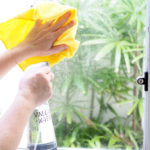
Yes, you could just clean your windows with Windex and a paper towel, but that’ll likely leave streaks. That’s why so many people recommend cleaning them with vinegar. Here’s how to do it:
First, make a mixture of one part vinegar and one part hot water in a bowl. Pour the mixture into a spray bottle. Then, spray the mixture over a small area (about one square foot) at the top of your window pane. Let it sit for a few minutes, then wipe it up using a microfiber cloth. Continue working in small areas until the entire window is clean.
Step 17 – Clean The Refrigerator

Please resist the urge to do a deep clean of your refrigerator. Instead, just go through each shelf and remove everything that has expired. Next, use a clean cloth and warm, soapy water to wipe down any spills you see. Then, put everything back in its rightful place.
Now that the inside is clean, you’ll want to focus your attention on the exterior. Wipe down the entire outside of the fridge and polish it with a stainless-steel cleaner if necessary. Lastly, use a long-handled dusting tool to quickly clean the top of the refrigerator.
NOTE: If you’re really pressed for time, you can always skip this step and save it for when you plan to do an all-day cleaning session.
Step 18 – Clean Your Floor

Now that everything else in your kitchen is clean, there’s only one thing left to wash: the floor. It’s best to save this task for last—with the vacuuming task if you’re ever going to do all this cleaning at once—because if there’s one thing you’re likely to get dirty cleaning everything else, it’s your floor.
Once the vacuuming is done, grab your bucket and mop and clean your floor. Again, if you happen to have a robot mop, it’s even better since you can sit back while it does the cleaning for you. FYI, robot mops are similar to robot vacuums in that they don’t provide a deep clean, but instead provide an extra level of clean to reduce the number of times you have to deep-clean your kitchen floor.
You may also like


